iSpring Learn LMS Integration Guide
1. How it works
The integration is supported on cloud and on-premise versions of iSpring Learn. On-premise software is installed and runs on a company's own hardware infrastructure and is hosted locally, whereas cloud software is stored and managed on the provider's servers and accessed through a web browser or other interface.
OctoProctor is a solution for online monitoring, recording, and evaluating user behavior throughout online assessments. OctoProctor allows you to track user activity and verify their identity, so you can ensure accurate and valid assessment results.
Proctoring is the procedure for monitoring the progress of a remote assessment.
A proctor is an observer who monitors compliance with the rules.
2. How to Create a Proctor Role
To create a proctor role:
-
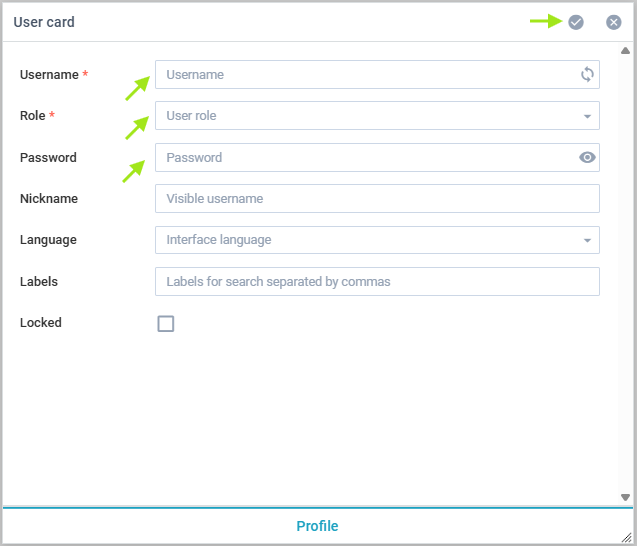
Go to the "Users" section and click the "Add" icon.

-
In the user profile, fill in the required fields and create a username and password.
-
Save the profile.
Done! You've added a proctor.
3. How to Create a Proctoring Template
A template in OctoProctor defines the settings that sessions will be based on. To create one:
-
Go to the Assessments section and click the "Add" icon.

-
Enter the name of the template in the "Identifier" field. Later, you'll use this name when enabling the integration in iSpring Learn.
-
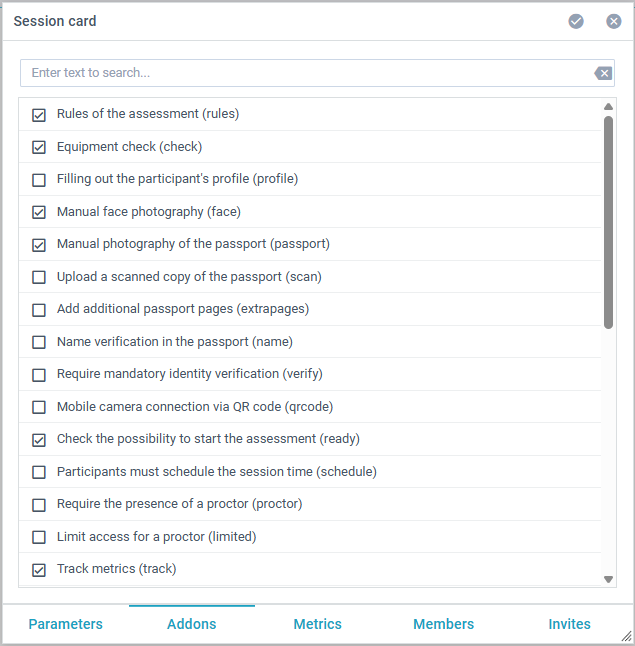
Go to the "Add-ons" tab and select what the user should check and provide before the assessment, such as a photo of their passport.
-
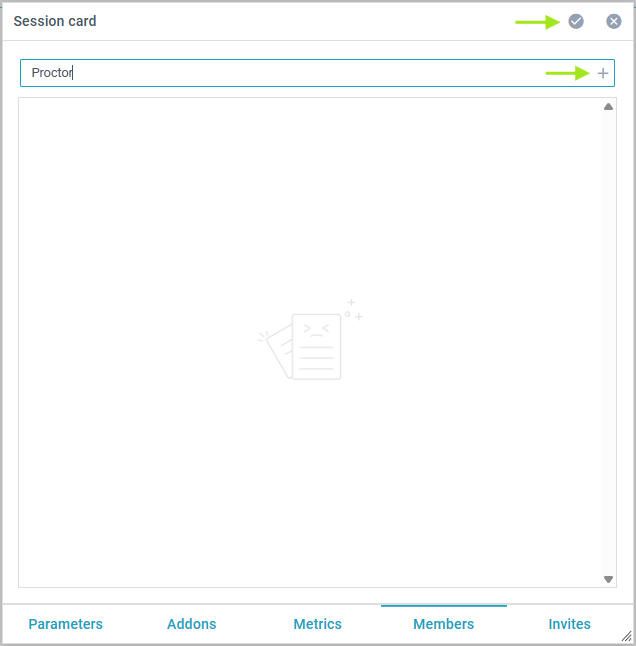
In the "Members" section, add a proctor. In the search field, enter the proctor's login and click the add icon. When everything is filled in, click the save icon
Perfect! You've created a proctoring template.
4. How to Enable and configure Integration with OctoProctor
To enable and set up the integration:
-
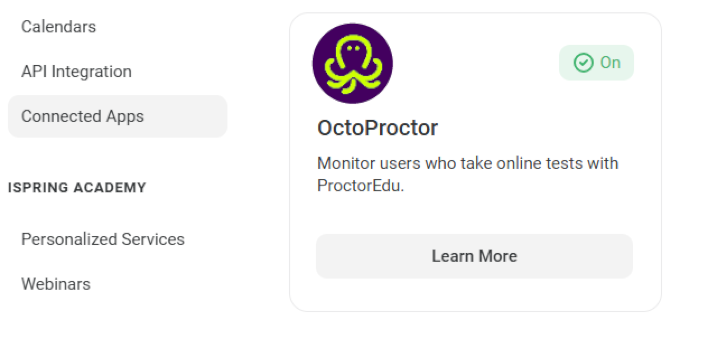
Go to "User profile (top right)" → "Administrator Portal" → "Services (bottom left)" → "Connected Apps" and click "Learn more".
-
Read the description of the integration and leave a request to enable it.
-
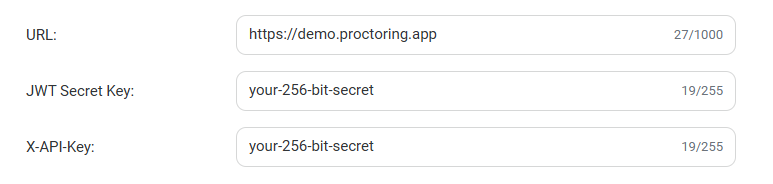
Fill in the required fields in iSpring Learn:
- URL: You'll receive the URL when purchasing your OctoProctor account.
- JWT Secret Key: You'll receive the JWT Secret Key when purchasing your OctoProctor account.
- X-API-Key: You'll receive it when purchasing your OctoProctor account.
-
Once completed, click Enable. The integration is enabled.
NOTE: Proctoring does not work in the iSpring Learn mobile app.
5. How to Set Up Proctoring for a Quiz
Proctoring works only for standalone quizzes. This can be an online quiz or a quiz created with QuizMaker.
To set up proctoring for a quiz:
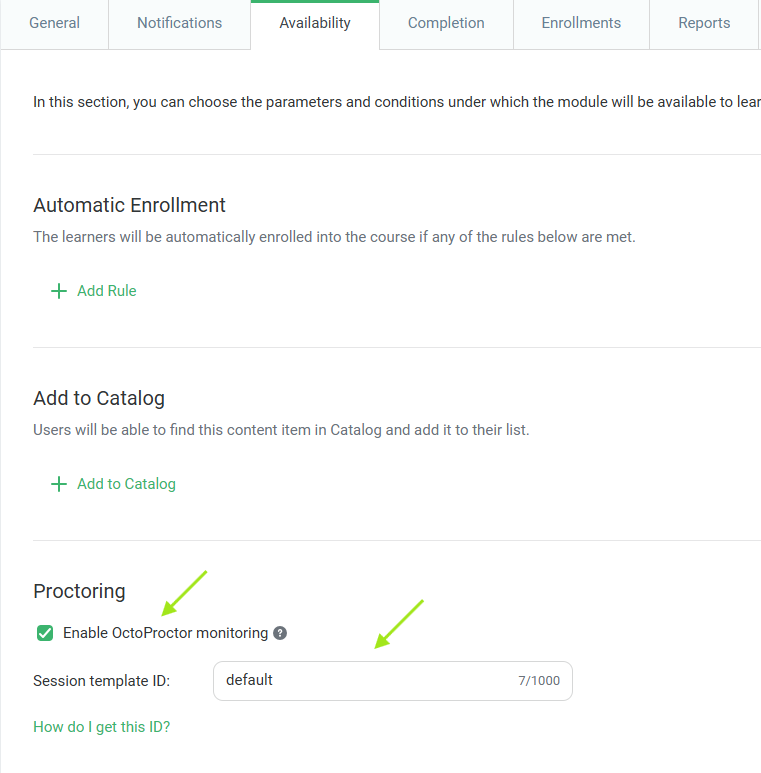
- Open the quiz and go to the "Availability" section.
-
Scroll to the Proctoring section and check the Enable OctoProctor monitoring box.
-
Specify the template "Identifier" from clause 3.
- Save the settings
Done! Now you can control the reliability of online assessments. If the quiz has linked copies, proctoring will work for them as well.
6. Configuring a self deployed proctoring host
To connect the integration API with your LMS, you need to load the following configuration with integration parameters under the proctoring system manager:
{
  "id": "<Host_ID>",
  "key": "<License_Key>",
  "params": {
    "webhooks": {
      "jwt": {
        "strategy": "jwt",
        "secretOrKey": "your-256-bit-secret",
        "callbackURL": "query.redirect",
        "profile": {
          "username": "payload.username",
          "role": "payload.role === 'proctor' ? 'proctor' : 'student'",
          "nickname": "payload.nickname",
          "lang": "payload.lang",
          "group": "payload.group",
          "referrer": "payload.referrer",
          "labels": "payload.labels"
        },
        "register": {
          "identifier": "payload.identifier",
          "template": "payload.template",
          "subject": "payload.subject",
          "members": "payload.members",
          "tags": "payload.tags",
          "code": "payload.code",
          "timeout": "payload.timeout",
          "lifetime": "payload.lifetime",
          "metrics": "payload.metrics",
          "weights": "payload.weights",
          "addons": "payload.addons",
          "threshold": "payload.threshold",
          "locale": "payload.locale",
          "timezone": "payload.timezone",
          "rules": "payload.rules",
          "url": "payload.url"
        },
        "submit": {
          "uri": "payload.api",
          "method": "POST",
          "headers": {
            "x-api-key": "your-256-bit-secret"
          },
          "body": {
            "identifier": "room.identifier",
            "link": "`https://${room.host}/api/report/${room.identifier}`",
            "status": "room.status",
            "duration": "room.duration",
            "startedAt": "room.startedAt",
            "stoppedAt": "room.stoppedAt",
            "score": "room.score",
            "student": "room.student.username",
            "proctor": "room.proctor.username",
            "comment": "room.comment",
            "signedAt": "room.signedAt",
            "conclusion": "room.conclusion",
            "averages": "room.violations",
            "verified": "room.student.verified"
          }
        }
      }
    }
  }
}
NOTE: You should replace
secretOrKeyandx-api-keywith a randomly generated sequence (Latin letters, mixed case, numbers; recommended length: 24 characters).idis the host's internal identifier (omit to create a new host).keyis the host's license key.