WebSDK-based Integration Guide
The Supervisor SDK is a JavaScript library that can be injected into the page of any Learning Management System (LMS) to implement seamless integration with the OctoProctor proctoring system. Full documentation for the WebSDK is available at https://demo.proctoring.app/docs/.
LMS Requirements:
- Proctoring pages in the LMS must be opened using the HTTPS protocol, with a valid SSL certificate installed on the web server. You can verify the validity of the certificate on your server using an SSL checker service or issue a free Let's Encrypt certificate.
- Assessment pages should not be completely reloaded when switching between questions. The WebSDK code should be launched at the beginning of the assessment and remain loaded until the end. The page can be reloaded by the user.
NOTE: The following integration parameters may change:
- Server address:
demo.proctoring.appis used as an example only. In production, always use the address of your proctoring server.- Authorization provider:
jwtis the default name, but it can be changed.- JWT secret key:
your-256-bit-secret, used to sign the JWT token.- Webhooks API key:
your-256-bit-secret, specified in theX-Api-Keyheader of the webhook to authenticate the request.
1. Proctoring scenario
The scenario of interaction of the test-taker and the proctor with the proctoring system and LMS in the general case is as follows:
- The test-taker logs in to the LMS, opens the assessment, and initiates the start of the proctoring session.
- Before the session, the test-taker completes several steps: agrees to the rules of the assessment, checks equipment, takes a photo of their face and passport, connects a mobile camera, and others.
- The test-taker starts the proctoring session and the assessment in parallel.
- During the assessment, video recordings of the webcam (with sound) and the computer screen are captured, violations are automatically tracked, and the test-taker is continuously verified and identified.
- During the session, the proctor can observe test-takers, and the system indicates in real time which test-takers need attention.
- The proctor can interact with test-takers via chat or through video and audio communication and can prematurely end the proctoring session in case of gross violations.
- After the assessment is completed, an assessment of the confidence level in the assessment results and a video protocol with detailed violations records are generated.
- Results are sent to the LMS via a webhook.
Technical implementation of the scenario:
- Server-Side (LMS): Implement an API to generate a JWT token and pass it to the front-end, where the proctoring session will be initialized using the Supervisor SDK's
start()function with this token. - Token Structure (see sections 2.1 and 2.2):
- Header: Specifies the HS256 algorithm and JWT type.
- Payload: Contains user and session parameters in JSON format.
- Signature: Formed based on the payload data and the secret key.
- Front-End (LMS): Implement a mechanism to receive a token for the current user and assessment via the API. Pass the received JWT token to the
tokenfield in thestart()function of the WebSDK (see section 2.3) - Proctoring System: When the proctoring session is initialized, a user and proctoring session are created (or updated) with parameters from the JWT payload. The test-taker sees preliminary steps before starting the session, after which tracking and recording begin.
- Test Display: Display assessment content to the test-taker only after successfully executing the
start()function (see section 2.3). Otherwise, the test-taker could access the assessment without proctoring. - Session Termination: When the assessment is finished, call the
stop()function to end the proctoring session (see section 2.3). Use thestopevent to handle this. - Results Delivery: After processing on the proctoring server, results are sent to the LMS via a webhook, using the URL specified in the
apifield (in the JWT payload), as a POST request inapplication/jsonormultipart/form-dataformat.
Below is a visualization of the scenario.
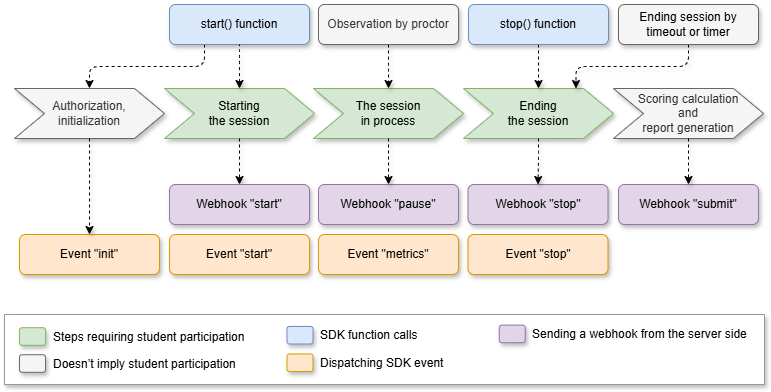
Before starting the session, each user completes preconfigured steps to meet proctoring requirements (each step can be enabled or disabled via add-ons). These include agreeing to assessment rules, accepting the agreement of the host if one is assigned (the session starts only after the test-taker accepts it and is allowed at their location), checking equipment, capturing facial and passport photos, connecting a mobile camera, and others.
The following interfaces may be displayed to the user before starting a proctoring session. The SDK user interfaces appear at the top of the current page and require no special preparation:
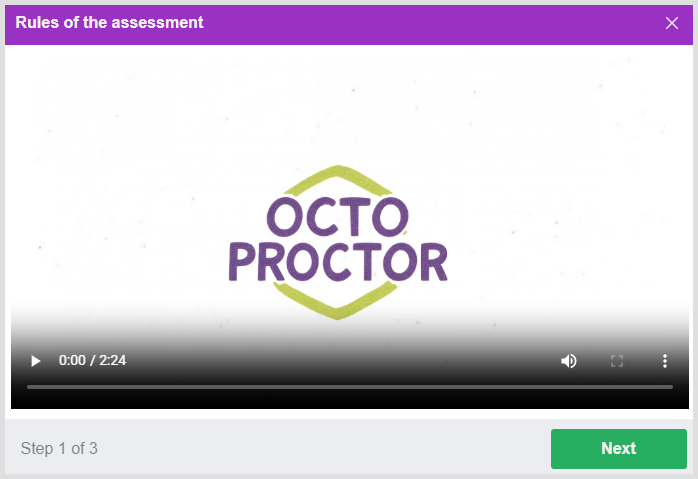
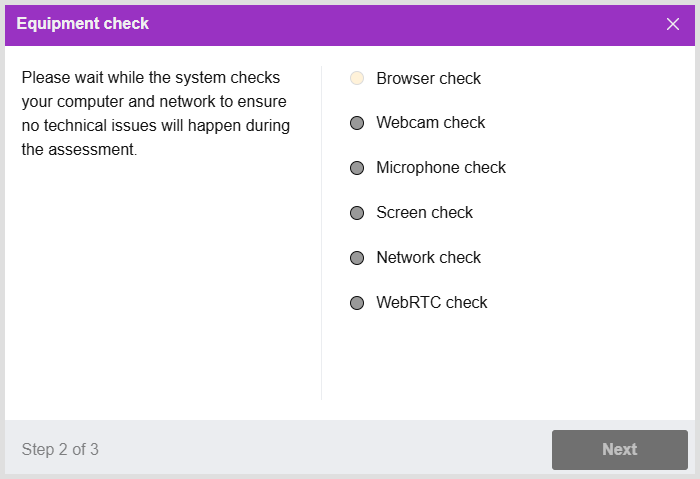
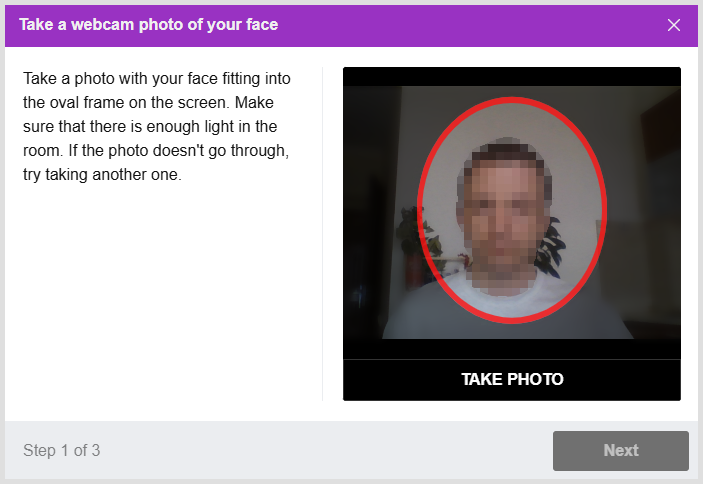
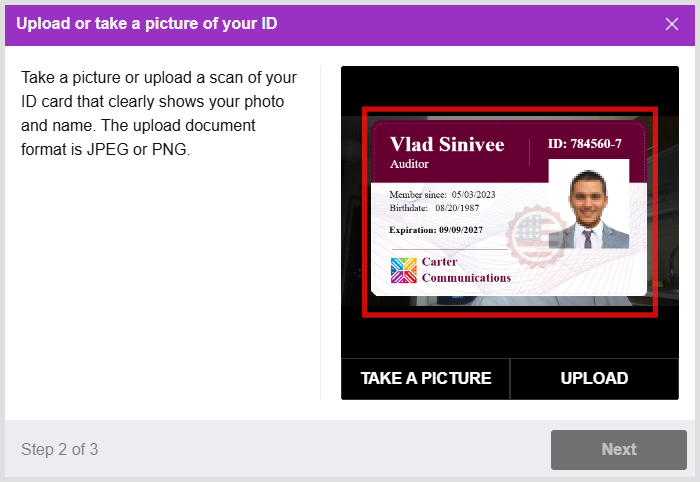
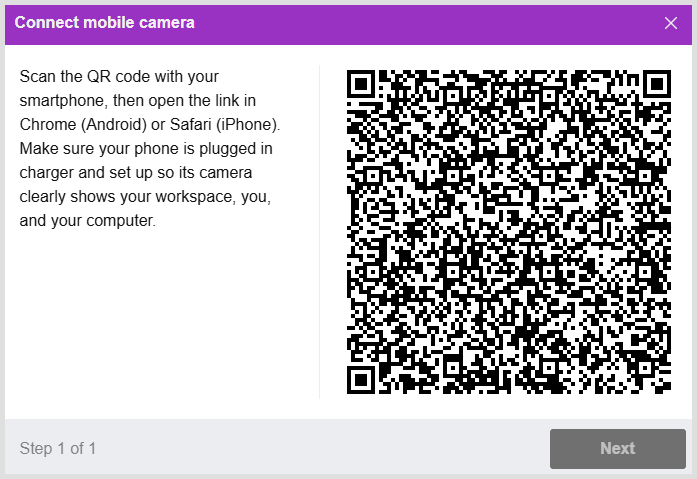
The computer equipment check includes verifying the browser, webcam, microphone, network, and screen capture. If no issues are found, the check passes automatically; otherwise, the user receives a message with a description of the problem and resolution options.
If all stages are successful, the proctoring session begins, observing the user. In this mode, the user can view video from their camera (preview), receive notifications of issues (violations are automatically detected), and access a chat to contact the proctor. A proctor can contact the user via chat, video, or audio and may end the session prematurely with a conclusion (positive or negative) and a comment, displaying a message to the user.
The session page should be opened in a single instance; the system monitors this independently. If the session is opened in multiple tabs, browsers, or computers, previous pages are automatically locked, and proctoring stops in those pages without terminating the session. The session can only resume in the last opened tab.
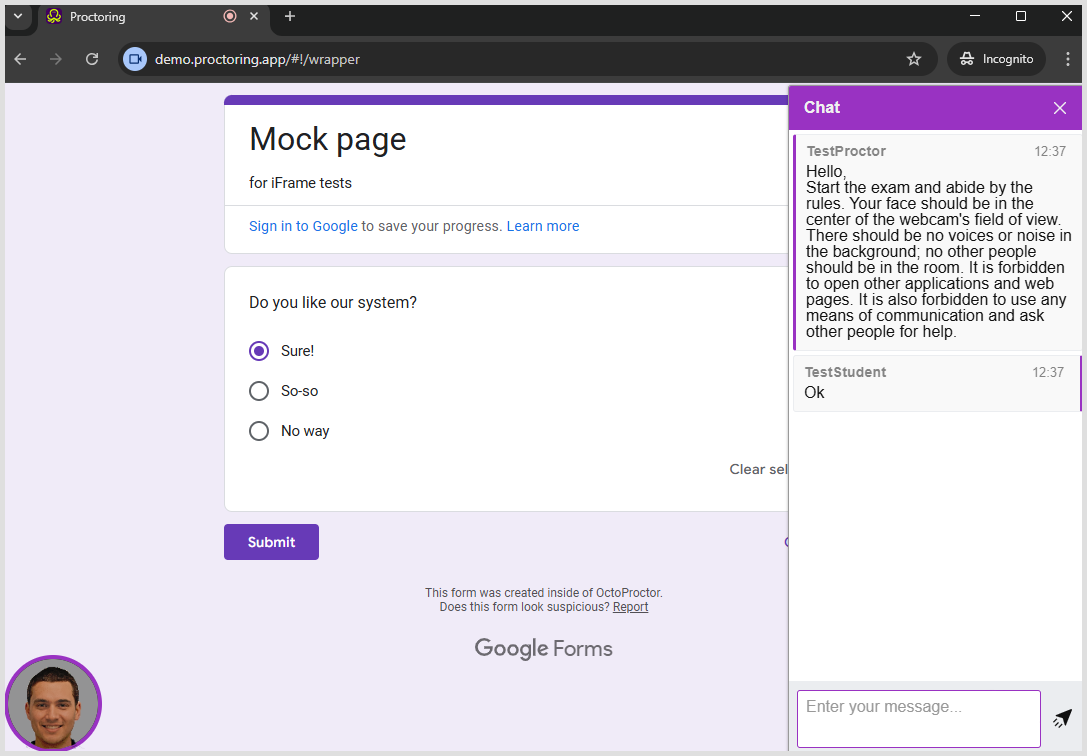
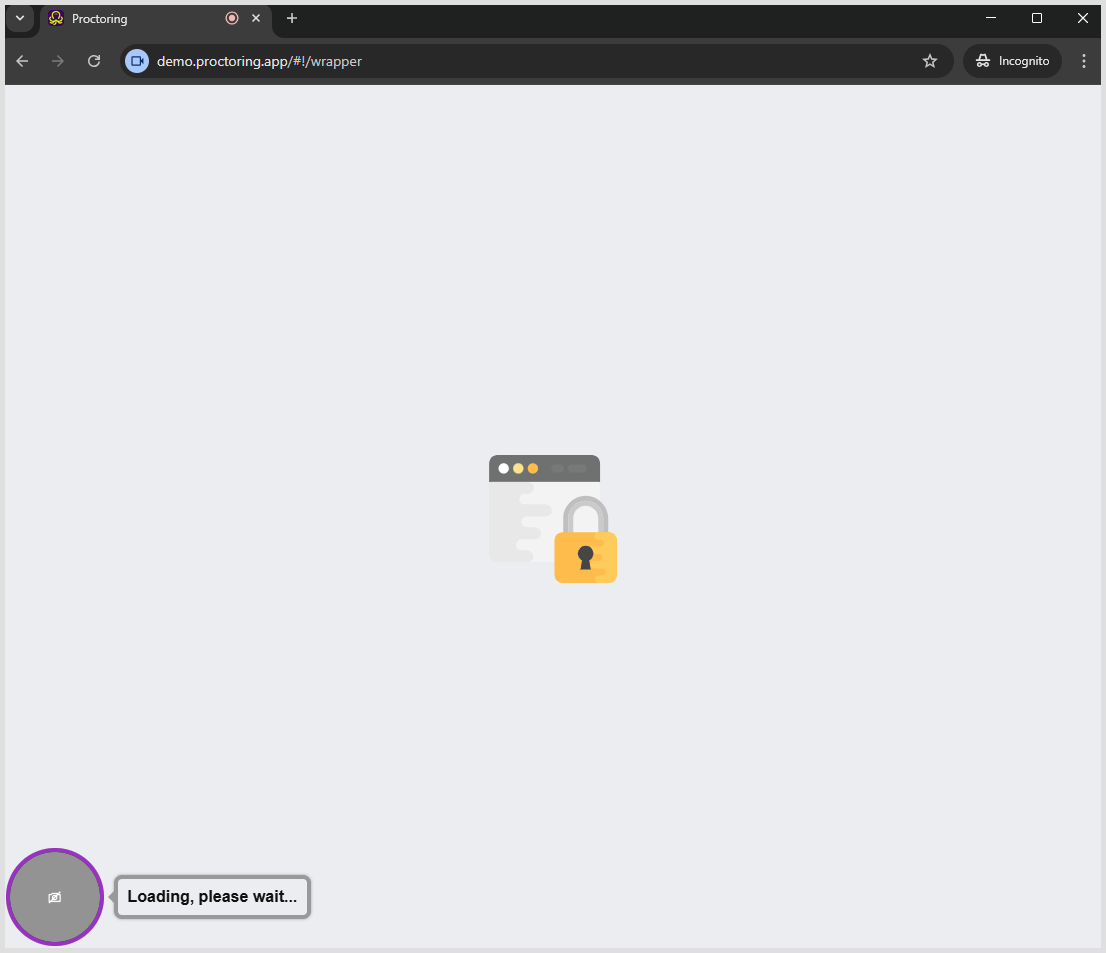
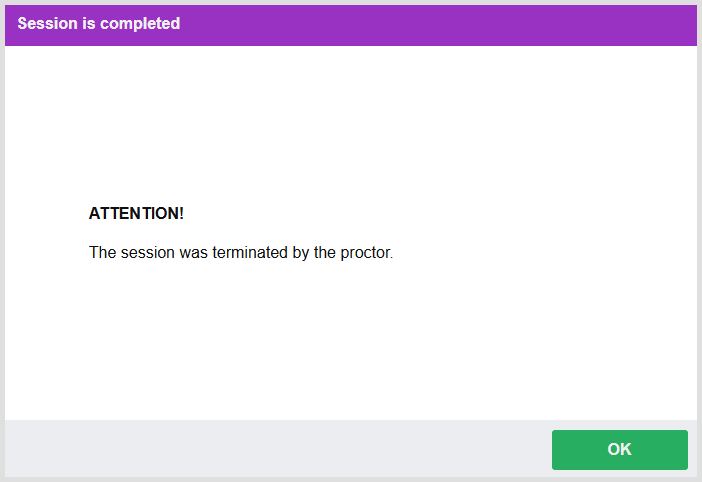
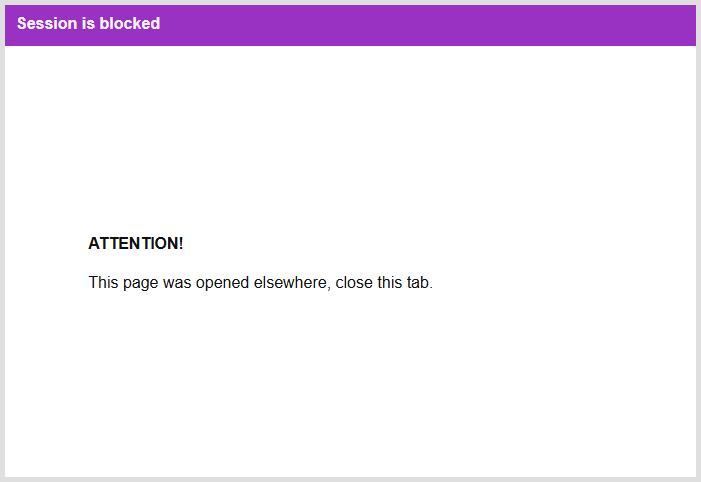
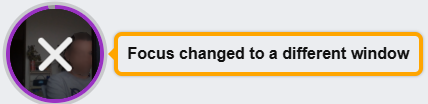
Notifications of problems (irregularities) are automatically displayed to the user, giving them the opportunity to correct the situation if the problem was unintentional. If the user does not respond to messages within a minute, then access to the content is automatically blocked until the problem is resolved (this behavior is controlled by the lock add-on).
Content copy protection mode prohibits copying text and images from the page using the clipboard and context menu, and also prohibits saving the page using the print dialog.
When the assessment is complete, the proctoring session should be stopped and all interfaces are hidden. The proctoring results are transferred to the LMS by webhook from the proctoring server.
2. Implementing integration
2.1. JSON Web Token (RFC 7519)
For secure transmission of parameters for a proctoring session with protection from changes on the part of the user, tokens are used according to the JSON Web Token (RFC 7519). The integration consists in implementing the JWT generation mechanism on the side of your LMS and using the WebSDK functions to manage the proctoring session.
JSON Web Token (JWT) is a JSON object that is defined in the open standard RFC 7519. It is considered one of the safest ways to transfer information between two participants. To create it, you need to define a header with general information on the token, payload data, such as the user name, his role, etc. and signature.
The diagram below shows the principle of user interaction with assessment and proctoring systems using JWT.
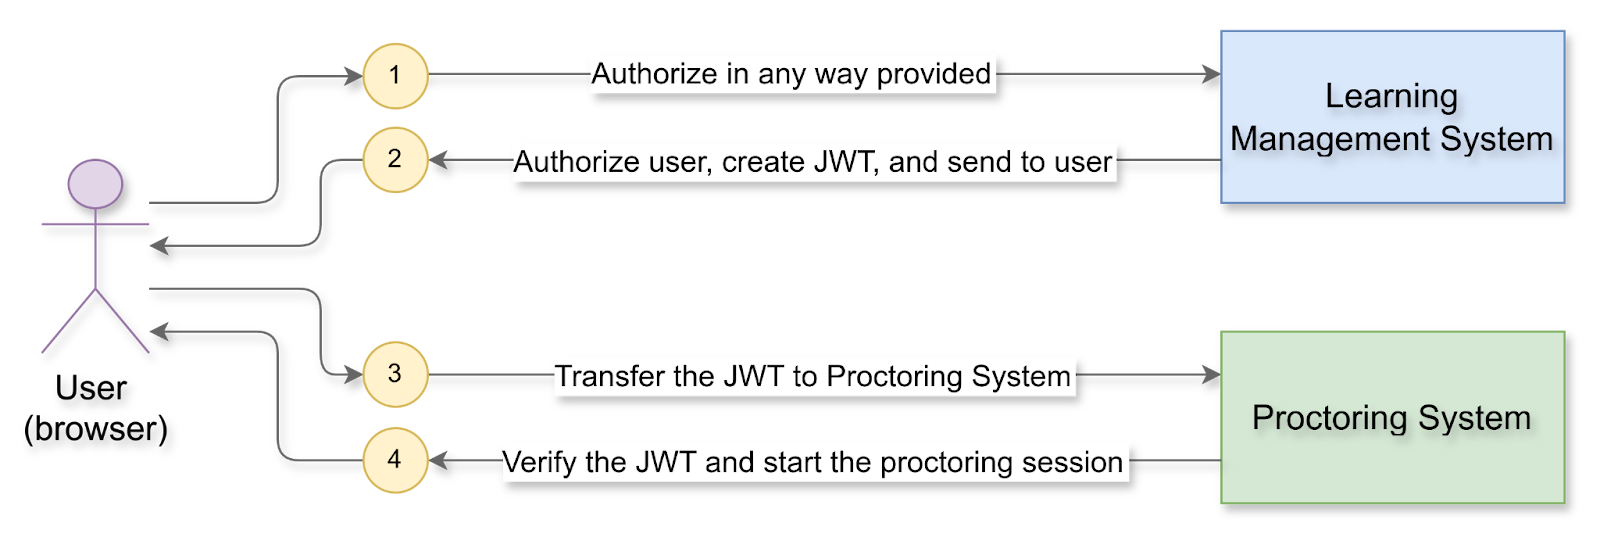
The general interaction scenario is as follows:
- The user of the LMS is authorized in it using the authorization mechanisms provided by the system.
- Before the start of each individual proctoring session, the LMS generates a JWT using a predefined secret key that should not be accessible to users. The key storage method is selected by the LMS itself.
- The JWT is transmitted to the user on the front-end, and the user initiates a session in the proctoring system via the WebSDK using the token received from the LMS. The JWT payload stores the user identifier (the
usernamefield), the proctoring session identifier (theidentifierfield), and other session parameters. - The proctoring system server receives the JWT, checks its validity, and then starts the proctoring session for this user.
2.2. Token generation
Token generation should be performed on the server, and only the token string should be transmitted to the client. To create a token:
-
Generate payload data in JSON format that describes the user and a specific session of this user in the following format:
{ "username": "a34c1a1a-53ef-4728-8dc5-9c4779a8586e", "nickname": "John Doe", "identifier": "565b30b8-5cfb-42e2-a292-478d20630d1b", "template": "default", "subject": "Tutorial: proctoring", "tags": [ "male" ] } -
Generate a token on the LMS server based on the payload data using a library (see the information on the jwt.io website). The encryption algorithm is HS256 and the token type is JWT. For the
demo.proctoring.appserver, the secret key used to generate tokens isyour-256-bit-secret. Using the payload above should produce the following token:eyJhbGciOiJIUzI1NiIsInR5cCI6IkpXVCJ9.eyJ1c2VybmFtZSI6ImEzNGMxYTFhLTUzZWYtNDcyOC04ZGM1LTljNDc3OWE4NTg2ZSIsIm5pY2tuYW1lIjoiSm9obiBEb2UiLCJpZGVudGlmaWVyIjoiNTY1YjMwYjgtNWNmYi00MmUyLWEyOTItNDc4ZDIwNjMwZDFiIiwidGVtcGxhdGUiOiJkZWZhdWx0Iiwic3ViamVjdCI6IlR1dG9yaWFsOiBwcm9jdG9yaW5nIiwidGFncyI6WyJtYWxlIl19.1sHajdMz3n82hQEsfJTE3bii6mV3nOtTLkxTe6qwzuI
A description of the parameters that can be used in the JWT payload is given in table below. Please try to use the required minimum of parameters, usually these are: exp, username, nickname, template, identifier, subject, tags, api. It is advisable to use the rest of the parameters only if their change is foreseen by the LMS. If you need to specify different session parameters for different cases, it is better to use session templates.
Description of parameters
JWT Validation
| Parameter | Type | Description |
|---|---|---|
iat |
Number | UNIX time (in seconds) when the token was issued |
exp |
Number | UNIX time (in seconds), after which the token becomes invalid |
User Profile
| Parameter | Type | Description |
|---|---|---|
username* |
String | unique user id, use of characters is allowed: A-Za-z0-9_-, there should be only one ID for each user |
role |
String | user's role ("student" or "proctor"), by default is "student" |
nickname |
String | user's visible name |
group |
String | user's group (for the "proctor" role only) |
labels |
String[] | tags for search the user |
lang |
String | UI language (e.g. "en"), by default is the browser language |
referrer |
String | redirection page after logging out of the proctoring system |
Proctoring Session
| Parameter | Type | Description |
|---|---|---|
identifier* |
String | unique proctoring session identifier, use of characters is allowed: A-Za-z0-9_-, each individual session must have its own ID |
template |
String | template identifier for the proctoring session, use of characters is allowed: A-Za-z0-9_- |
subject |
String | title of the session |
timeout |
Number | session timeout in minutes (integer): the session is stopped when it has had no update for that long (inactivity) |
lifetime |
Number | session lifetime in minutes (integer): the longest the session may run, counted from its start, whatever the activity |
members |
String[] | list of proctor's logins to add to the members in the session |
metrics |
String[] | list of metrics in the session (e.g. b2, c2) |
weights |
Number[] | list of weights for the metrics |
addons |
String[] | list of add-ons in the session |
threshold |
Number | threshold value of the credibility for automatic conclusion and notification of the participant |
locale |
String | PDF report language (e.g. "en") |
timezone |
String | PDF report time zone (e.g. "Europe/Berlin") |
rules |
String | URL of a page with the rules of the event, shown as the first stage; with no page there is no such stage |
url |
String | URL of an assessment page to be opened in IFRAME; with the quiz add-on, the URL of the quiz package (ZIP) for the quiz player |
code |
String | access code to inject into an assessment page in IFRAME |
api |
String | API address to send results for this session to another server via webhooks |
tags |
String[] | tags for search the session |
* — required parameters
2.3. Integration code
Below is a sample of the WebSDK integration code:
<script src="//demo.proctoring.app/sdk/supervisor.js"></script>
<script>
  // create Supervisor instance
  var supervisor = new Supervisor({
    url: 'https://demo.proctoring.app',
  });
  // add a handler for the "start" event
  supervisor.on('start', function () {
    // start assessment in the e-learning system here
  });
  // add a handler for the "stop" and "fail" events
  supervisor.on(['stop', 'fail'], function () {
    // log out of the session with redirection to home page
    supervisor.logout({ redirect: '/' });
  });
  // initialize the session and start it
  supervisor.start({
    // set your provider name
    provider: 'jwt',
    // get JWT string from your server
    token: fetch('/api/token').then(function (response) {
      if (response.ok) return response.text();
      else throw Error('Failed to get JWT');
    })
  }).catch(function () {
    // the error is handled by the "fail" event above, this only prevents an unhandled promise rejection
  });
  // stop the session after assessment in the e-learning system is over,
  // the timeout function is used here as an example
  setTimeout(function () {
    // stop the session
    supervisor.stop();
  }, 5 * 60 * 1000); // 5 minutes
</script>
First of all, you should add the supervisor.js script to the page where you want to use the proctoring service:
<script src="//demo.proctoring.app/sdk/supervisor.js"></script>
In general, working with the WebSDK for a user in the "student" role means inserting a small piece of JavaScript code on each page where proctoring is required.
After loading the script, you should create an instance of the Supervisor class:
var supervisor = new Supervisor({
  url: 'https://demo.proctoring.app',
});
It is important that the supervisor.js script is loaded from the same proctoring server as specified in the url field. Otherwise, after the proctoring server has been updated, a WebSDK version and a server version may be different, which will cause problems in the functioning of the proctoring service. It is also recommended to use only one instance on a page.
Next, you should call the start() function with parameters to initialize and start the proctoring session. It is necessary to pass the JWT string to the client to the browser and use it in the start() function in the token field:
supervisor.start({
  // set your provider name
  provider: 'jwt',
  // get JWT string from your server
  token: fetch('/api/token').then(function (response) {
    if (response.ok) return response.text();
    else throw Error('Failed to get JWT');
  })
});
The provider may have a different name, so you should make arrangements to change it. Note that the start() function with parameters is a shortcut for sequential calls to the init() and start() functions:
supervisor.init({ ...payload }).then(function () {
  // start the session
  return supervisor.start();
});
If the start() function is called without parameters, the proctoring session starts in self-registration mode:
supervisor.start();
In most cases, such as when the page is refreshed in the browser, the session can be resumed. In this case, use the same identifier and username in the JWT payload and call the start() function again.
When the session is successfully started by the start() function, the start event is invoked, which can be subscribed to using the following script:
supervisor.on('start', function () {
  console.log('started');
});
While the session is initializing and starting, a critical error may have occurred, interrupting the process. You should handle this error by subscribing to the fail event. For example, you can redirect the user to another page when the error occurs: The promise returned by start() is rejected with the same error, so add a catch handler to it if your code does not use the promise.
supervisor.on('fail', function () {
  // log out of the session with redirection to home page
  supervisor.logout({ redirect: '/' });
});
When an assessment is completed, it is also necessary to call the stop() function to terminate the proctoring session. Otherwise, the last minute may not be saved and the session will not be automatically terminated until the time specified by the timeout has elapsed.
supervisor.stop();
When the session is finished (the session can be finished by a participant, a proctor, or automatically by timeout or deadline), the stop event is invoked, which can be subscribed to as follows:
supervisor.on('stop', function () {
  // log out of the session with redirection to home page
  supervisor.logout({ redirect: '/' });
});
If you do not subscribe to the stop event, the redirect to the referrer page will occur automatically after the session is stopped by the stop() function or the "Finish" button, by a proctor, when the lifetime has expired, or when the deadline has exceeded. By the way, you can subscribe to multiple events at once, just pass an array of event names to the on() function:
supervisor.on(['stop', 'fail'], function () {
  // log out of the session with redirection to referrer page
  supervisor.logout({ redirect: true });
});
The logout() function is used to log out of the current session and redirect to the specified page if the redirect parameter is filled. You can specify a page URL or pass true to redirect to the referrer page, which is automatically determined or passed by the referrer field in the JWT payload.
2.4. Data-attributes for session initialization
For simple WebSDK use cases, there is an automatic initialization and session startup, as well as a payload transfer using the data attributes of the script. Table below lists the supported data-attributes.
Data-attributes for automatic session initialization
| Parameter | Description |
|---|---|
data-supervisor |
If this parameter is set up it indicates that automatic WebSDK initialization is required. Two values are supported: - sync to start the proctoring session with the session token from the #token=<token> fragment of the page address, or, after a page reload, with the stored token;- init to start the proctoring session with the token from the fragment, else, if the script has no other data-* attributes, with the stored token, else with a payload from the data-* attributes, or in self-registration mode if there are none.The values start and auto are deprecated aliases of sync. |
data-allowed-origins |
Origins of other windows (separated by spaces or commas) that may control the session by messages, in addition to the frame with the assessment. It is not a part of the payload. |
data-* |
Other possible fields for a payload that can be used for the specified provider. |
This initialization method can be used in conjunction with other integrations, such as LTI or JWT links. In this case, an additional parameter redirect is specified in the authorization link, which must contain the address of the page (/api/auth/<provider>?redirect=https://your-lms/path/to/sdk, a full URL that starts with https://; a relative path is not accepted) that hosts the code with automatic WebSDK initialization with one single data attribute data-supervisor. A code sample:
<script src="//demo.proctoring.app/sdk/supervisor.js" data-supervisor="sync"></script>
The "data-supervisor" attribute with the value "init" can be used to start a proctoring session on the LMS side with self-registration or with a payload. A code sample:
<script src="//demo.proctoring.app/sdk/supervisor.js" data-supervisor="init"></script>
Script instance and commands from the assessment
The script starts only in the top window of the page. The instance of Supervisor that it creates is also available as the global variable window.supervisor, so the scripts of the page can subscribe to its events or call its methods without creating a second instance, for example supervisor.on('stop', function () { ... }).
The page with the assessment, opened in the frame, can control the session by messages to the top window. The command field is a method name or a list of them, where a method with parameters is a pair of the name and the parameters:
window.parent.postMessage({ type: 'supervisor', command: 'stop' }, '*');
window.parent.postMessage({ type: 'supervisor', command: [['stop', {}], 'logout'] }, '*');
The commands init, sync, start, stop, close and logout are accepted. Messages from other windows are ignored, unless the origin of the sender is listed in the data-allowed-origins attribute.
Session token and page reload
After authorization via /api/auth/<provider>?redirect=<page>, the proctoring server redirects the user to the page with the session token in the URL fragment: https://your-lms/proctoring.html#token=<token>. The WebSDK handles this token automatically:
- It reads the token from the fragment and immediately removes it from the page address, so the token does not remain in the browser history or in a copied link.
- It saves the token in the browser's
localStorage, on the origin of the page that hosts the script, and renews it while the session is running. - After a page reload, there is no token in the address anymore, so the WebSDK takes the saved one and resumes the session.
- When the session ends, the saved token is deleted: by
stop()if there is nostopevent handler (see section 2.3), otherwise bylogout(), which your handler should call.
The two values differ in what happens when there is no token in the address and no saved token:
| Value | Token in the address | Saved token only | No token |
|---|---|---|---|
sync |
Starts the session | Resumes the session | Does nothing |
init |
Starts the session | Resumes the session, unless the script has other data-* attributes |
Self-registration, or a payload from data-* attributes |
Because sync does nothing without a token, it is safe to place on pages where a proctoring session may not be running, for example in a common page template of the LMS. The init value shows the self-registration dialog to every visitor without a token, so use it only on the dedicated proctoring pages.
If the token is not accepted by the server (it is expired or the session is finished), the WebSDK deletes it and redirects the user to the home page (/) of the site: the referrer from the JWT is not known yet, because the session has not been loaded.
NOTE: The token is saved only if the browser allows access to
localStorage. If the storage is blocked (for example, in a private window with site data disabled), the session cannot be resumed after a reload, and the user has to open the proctoring link again.
2.5. Logging Module (Diagnostics & Troubleshooting)
The Logging Module is a specialized tool designed primarily for diagnostics and resolving technical issues. It records internal events occurring within the supervisor and outputs them directly to the browser console.
By default, these logs are silent to ensure zero performance overhead during standard operations. They are intended to only be enabled when gathering data for the OctoProctor customer success team.
2.5.1. How to Enable Logging
The setting is the proctoring:debug key of the browser's localStorage. Its value is a list of patterns separated by commas, in the form proctoring:<module>. A * matches any characters, and a pattern with - in front excludes a namespace, for example proctoring:*,-proctoring:session. The key is read at each log call, so a page refresh is not needed.
There are two ways to activate the module depending on your workflow:
Option 1: Via the Browser Console (Manual)
This method is ideal for quick on-the-spot testing.
- Open the browser console and run:
localStorage.setItem('proctoring:debug', 'proctoring:*') - Start the proctoring session; all modules will now be logged. The messages appear in the console as
[proctoring:<module>]. - To stop logging: Run
localStorage.removeItem('proctoring:debug').
Option 2: Via Page Code (Automatic)
If you need to capture logs from the very first second without user intervention, place this script before the supervisor script loads:
<script>
  if (!localStorage.getItem('proctoring:debug')) {
    localStorage.setItem('proctoring:debug', 'proctoring:*');
  }
</script>
NOTE: The key stays in the browser's storage until it is removed, so remove the script from the page, and the key with
localStorage.removeItem('proctoring:debug'), when the diagnostics are no longer needed.
2.5.2. Targeted Logging
If you only need to monitor a specific module to reduce console "noise," you can enable modules individually:
localStorage.setItem('proctoring:debug', 'proctoring:recorder')— the video recording process;localStorage.setItem('proctoring:debug', 'proctoring:dispatcher')— the task queue that sends the recorded data to the server;localStorage.setItem('proctoring:debug', 'proctoring:session')— the calls to the proctoring server and the renewal of the session token.
3. Real-time observation and access to reports
A user with the "proctor" role can log in to real-time sessions and view reports by logging in to the proctoring system with a JWT token, or with a username and password. In the observation interface, a proctor sees only those sessions of which he or she is a member.
A proctor can log into the proctoring system using a username and password. To do this, proctor accounts must be created in advance through the admin panel, and their logins must be added to the appropriate sessions (the members field of the JWT payload, or the invites field of the session template).
You can create specific links to go to a particular session report. A link opens the report in the proctoring interface, and only for a signed-in proctor or administrator: a report cannot be opened without authorization, so the user is asked to log in first. A link to a report is formed as follows:
https://demo.proctoring.app/api/report/<identifier>
Variables to replace:
demo.proctoring.appis your proctoring server domain,<identifier>is the session identifier.
Add ?format=pdf to the link to open the PDF report of the session, if it has been generated.
You can authorize a specific proctor with automatic account creation in the proctoring system using a link with a JWT string. Here is an example of how to fill in the JWT payload fields to authorize a proctor:
{
  "username": "proctor1",
  "role": "proctor"
}
Here is an example of a link with authorization by JWT string:
https://demo.proctoring.app/api/auth/jwt?token=<JWT>
Variables to replace:
demo.proctoring.appis your proctoring server domain,jwtis the name of the authorization provider,<JWT>is the generated token string.
If you specify the identifier field, the specified report will be opened immediately after authorization.
4. Retrieve proctoring results via webhooks
The proctoring system can use webhooks in JSON format to send the results of proctored sessions to the LMS. This is useful if you want to combine assessment results and proctoring results directly on your side. Results are sent within about a minute after the test-taker or proctor finishes the session or the session is automatically terminated by a timeout, and again when the proctor's conclusion is issued (or changed) after reviewing the report for some time after the session ends.
The results are sent from the proctoring system server to the LMS server via an HTTP request by the POST method using the URL specified in the api field of each session. The content type (the Content-Type header) is application/json. Access to the API should be restricted by the key passed in the header of the HTTP request (by default, this is the X-Api-Key header). A request with one identifier can be executed several times with different data, therefore it is necessary to provide for its update in the LMS when data is received again from the proctoring system. If all goes well, the response code should be 2xx (usually 200), the content of the response body is not taken into account and is usually left blank. In the case of an error, the API should return a response code other than 2xx; a response that takes more than 60 seconds is also an error. A failed request is not repeated by default. To repeat it, set the retryCount parameter in the submit block of the provider (see section 5): the total number of attempts, the first one included, with a pause that grows by a minute after each error.
Table below shows all the JSON fields in the response.
Fields description
| Field | Type | Description |
|---|---|---|
identifier* |
String | Session ID |
link |
String | URL to the session report |
status |
String | Session status:started - In progresspaused - Started, but inactiveskipped - Not started before deadlinestopped - Completed, not ratedaccepted - Positively ratedrejected - Negatively ratedundecided - Rated as uncertain |
duration |
Number | Actual duration of the session (in minutes) |
startedAt |
Date | Date and time of the actual start of the session |
stoppedAt |
Date | Date and time of the actual end of the session |
score |
Number | Automatic session scoring (0-100) |
student |
String | Test-taker's username |
proctor |
String | Proctor's username who rated the session |
comment |
String | Proctor's comment on the session |
signedAt |
Date | Date and time of proctor submission |
conclusion |
String | Conclusion on the session: positive, negative or uncertain |
violations |
Object | Metric violations per session, in { "metric": "value" } format |
verified |
Boolean | Identity check of the test-taker: true if the face matched, false if a check failed, null if none was made |
* — required fields, other fields may not be sent or may take a "null" value.
Optionally, you can include additional files in the webhook request (in the host configuration by manager role):
- photo of the participant's face (JPEG);
- photo of the participant's document (JPEG);
- PDF report file for the session.
To attach them, add the attach field to the submit block of the provider (a file name in the request → the file of the session):
"attach": {
  "pdf": "room.pdf",
  "face": "room.student.face",
  "passport": "room.student.passport"
}
In this case, the Content-Type header changes to multipart/form-data, containing a JSON file with results and additional binary files.
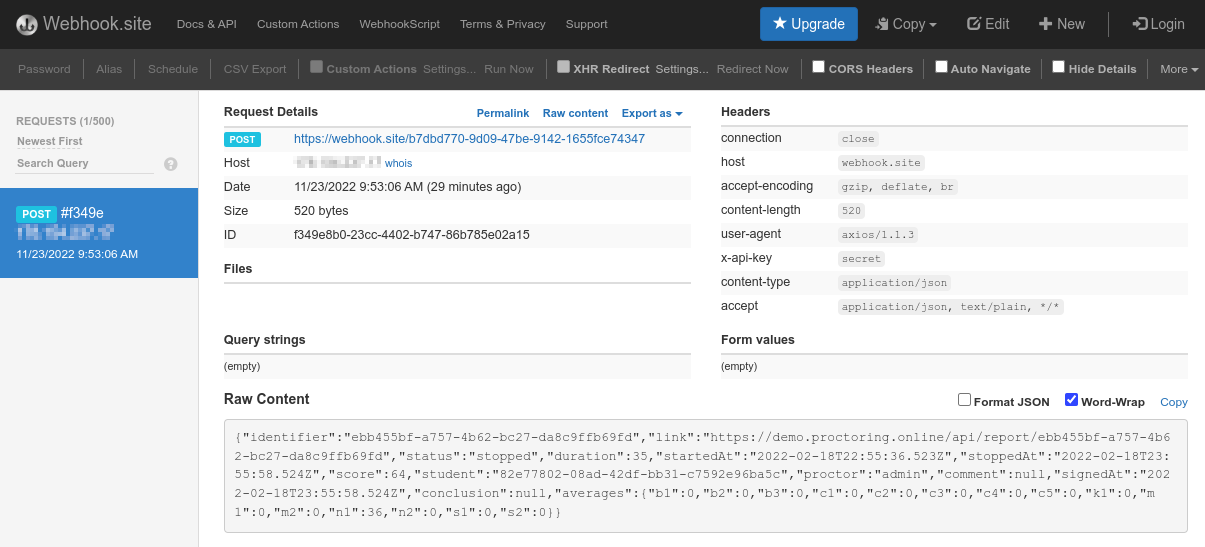
The webhook.site service can be used to test the webhook results API. To do this, specify the URL listed on the service page in the api field of the session created via JWT. Then start and stop the session, and a few minutes after the session ends, a request will be made to the specified URL. You can see the request parameters in the interface of this service.
5. Setting up the proctoring host
To connect the integration API with your LMS, you need to load the following configuration with integration parameters under the proctoring system manager:
{
  "id": "<Host_ID>",
  "key": "<License_Key>",
  "params": {
    "webhooks": {
      "jwt": {
        "strategy": "jwt",
        "secretOrKey": "your-256-bit-secret",
        "callbackURL": "query.redirect",
        "profile": {
          "username": "payload.username",
          "role": "payload.role === 'proctor' ? 'proctor' : 'student'",
          "nickname": "payload.nickname",
          "lang": "payload.lang",
          "group": "payload.group",
          "referrer": "payload.referrer",
          "labels": "payload.labels"
        },
        "register": {
          "identifier": "payload.identifier",
          "template": "payload.template",
          "subject": "payload.subject",
          "members": "payload.members",
          "tags": "payload.tags",
          "code": "payload.code",
          "timeout": "payload.timeout",
          "lifetime": "payload.lifetime",
          "metrics": "payload.metrics",
          "weights": "payload.weights",
          "addons": "payload.addons",
          "threshold": "payload.threshold",
          "locale": "payload.locale",
          "timezone": "payload.timezone",
          "rules": "payload.rules",
          "url": "payload.url"
        },
        "submit": {
          "uri": "payload.api",
          "method": "POST",
          "headers": {
            "x-api-key": "your-256-bit-secret"
          },
          "body": {
            "identifier": "room.identifier",
            "link": "`https://${room.host}/api/report/${room.identifier}`",
            "status": "room.status",
            "duration": "room.duration",
            "startedAt": "room.startedAt",
            "stoppedAt": "room.stoppedAt",
            "score": "room.score",
            "student": "room.student.username",
            "proctor": "room.proctor.username",
            "comment": "room.comment",
            "signedAt": "room.signedAt",
            "conclusion": "room.conclusion",
            "violations": "room.violations",
            "verified": "room.student.verified"
          }
        }
      }
    }
  }
}
NOTE: You should replace
secretOrKeyandx-api-keywith a randomly generated sequence (Latin letters, mixed case, numbers; recommended length: 24 characters).idis the host's internal identifier (omit to create a new host).keyis the host's license key.
6. Integration checklist
To verify that the WebSDK integration is correct, use the following checklist:
- The
supervisor.jsscript must be downloaded by the client-side from the same server it connects to, to avoid version mismatches causing errors. Make sure to replacedemo.proctoring.appwith your proctoring host. - Proctoring starting with the
start()function is usually performed just before assessment with proctoring. During the initialization process, the user will see interfaces with preliminary steps (assessment rules, equipment check, take photos, connect mobile camera, and others). Thestart()function may return an error, in which case the assessment cannot be started. - After successful proctoring starts, the assessment should appear to the user. Training or some preliminary actions should not be included in the proctoring session, only the assessment itself (with a time limit), otherwise it may negatively affect the proctoring scoring.
- When the page is refreshed (F5 or closing and reopening), the assessment and proctoring session should be restored in the same way as the first run through the
start()function, in which case the session identifier (theidentifierfield) and the user (theusernamefield) should not change. - After the assessment is completed, the proctoring session should be terminated with the
stop()function. - The
start()andstop()functions can crash with a critical error. But you should handle this by subscribing to thefailevent. You can use thelogout()function within this handler to redirect to another page. - When a proctoring session ends, access to the assessment should be closed. A proctoring session can be terminated by a participant, a proctor, or automatically by timeout and deadline. The
stopevent subscription can be used to handle this. You can use thelogout()function within this handler to redirect to another page. - You can use the webhook.site service to test receiving results via webhooks.